

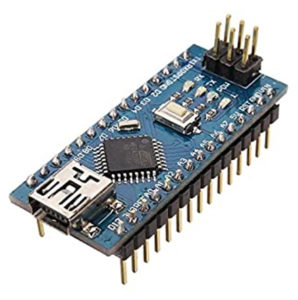
1. Arduino NANO
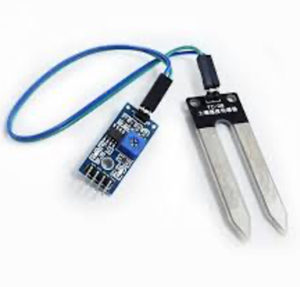
2. A soil moisture sensor
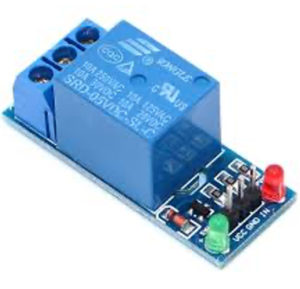
3. An Arduino Relay module
4. A 12-V battery — 1 AH or more

5. A mini submersible water pump

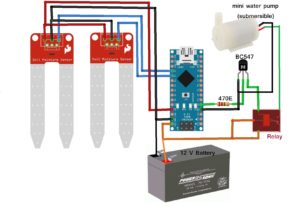
Circuit diagram
Now, here’s how it works…
The relay is used to switch ON/OFF the water pump. It’s connected between the “NO” (normally open) terminal and the circuit ground.
Arduino drives the relay through the NPN transistor BC547. Arduino’s digital pin D2 is used to switch ON/OFF the relay by using the transistor. (The transistor is connected in the switch configuration.)
The relay and water pump both operate at 12 V, which is provided by the battery.
The battery also provides Arduino’s VIN pin 12 V.
Note: only two sensors are shown in the diagram, but one can connect eight sensors to eight of Arduino’s analog input pins (A0 – A7).
Circuit operation
The circuit operation is quite simple: when the soil begins to get dry, the sensor will output to the Arduino board, which switches ON the water pump. Once the soil is adequately watered, Arduino switches OFF the water pump. That’s it.
If the moisture level is less than the set threshold level (say, 10 or 20%), it will switch ON the relay through the transistor, turning ON the pump.
As the pump flows, the soil begins to moisten. Arduino will continuously read the soil’s moisture level from both sensors.
When a set moisture level is reached (say, 90 or 95%) in both of the sensor rods, Arduino will switch OFF the relay, which turns OFF the pump.
This cycle is continuous so the plant is watered when its soil becomes dry.
For this project, I’ve used only two sensors. But one can use a maximum of eight in different potted plants.
Software program
#define sen1 A0
#define sen2 A1
int led1=3,led2=4,led3=5, pump_rly=2;
void setup()
{
// put your setup code here, to run once:
pinMode(led1,OUTPUT);
pinMode(led2,OUTPUT);
pinMode(led3,OUTPUT);
pinMode(pump_rly,OUTPUT);
digitalWrite(led1,LOW);
digitalWrite(led2,LOW);
digitalWrite(led3,LOW);
digitalWrite(pump_rly,LOW);
Serial.begin(9600);
Serial.println(“automatic irrigation system using arduino”);
}
void loop()
{
// put your main code here, to run repeatedly:
int sen1_value, sen2_value,soil_moisture_level_1,soil_moisture_level_2;
sen1_value = analogRead(sen1);
sen2_value = analogRead(sen2);
soil_moisture_level_1 = map(sen1_value,200,1020,100,1);
soil_moisture_level_2 = map(sen2_value,200,1020,100,1);
Serial.print(“Soil Moisture level in POT 1: “);
Serial.print(soil_moisture_level_1);
Serial.println(‘%’);
Serial.print(“Soil Moisture level in POT 2: “);
Serial.print(soil_moisture_level_2);
Serial.println(‘%’);
if(soil_moisture_level_1<10)
{
digitalWrite(led1,HIGH);
Serial.println(“moisture level in POT 1 is low”);
}
else if(soil_moisture_level_1>90)
{
digitalWrite(led1,LOW);
Serial.println(“moisture level in POT 1 is adquate”);
}
if(soil_moisture_level_2<10)
{
digitalWrite(led2,HIGH);
Serial.println(“moisture level in POT 2 is low”);
}
else if(soil_moisture_level_2>90)
{
digitalWrite(led2,LOW);
Serial.println(“moisture level in POT 2 is adquate”);
}
/* if(sen3_value>500)
{
digitalWrite(led3,HIGH);
Serial.println(“moisture level in POT 3 is low”);
}
else if(sen3_value<50)
{
digitalWrite(led3,LOW);
Serial.println(“moisture level in POT 3 is adquate”);
}*/
if((soil_moisture_level_1<10) || (soil_moisture_level_2<10))
{
Serial.println(“PUMP ON”);
digitalWrite(pump_rly,HIGH);
}
if((soil_moisture_level_1>94) && (soil_moisture_level_2>94))
{
Serial.println(“PUMP OFF”);
digitalWrite(pump_rly,LOW);
}
delay(3000);
}
Also Watch
Nice Article Friend Visit My Websites
ReplyDeleteSmartphone Review
Gadget Review
Blogging Seo Tips
NagKudari Blogspot
Games Tips
Latest Apps
Laptop Review
Thanks for visiting !!!✌🏻🙂
ReplyDelete