
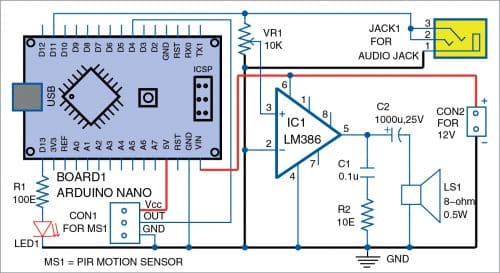
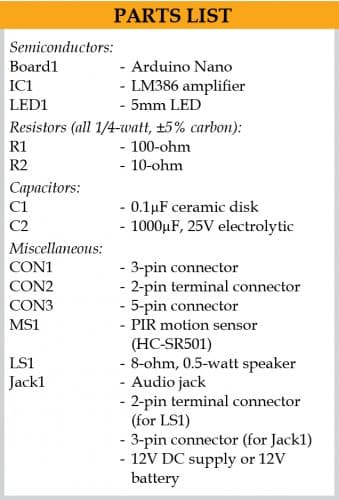
The circuit diagram of the motion sensor alarm is shown in Fig. 3. It consists of a PIR motion sensor (MS1), Arduino Nano (Board1), LM386 audio amp (IC1), and 8-ohm speaker. You can use any Arduino board in place of the Arduino Nano board.
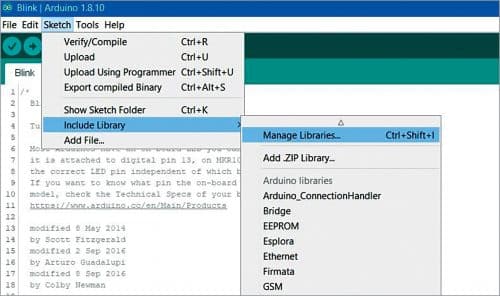
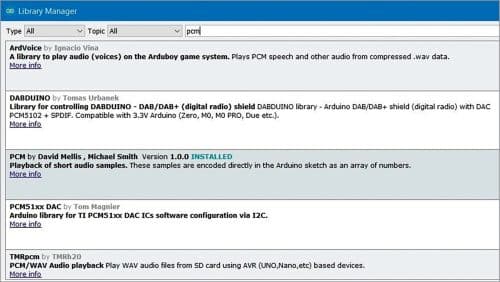
Install the required library in Arduino IDE by downloading the library from SketchInclude libraryManage Libraries options, as shown in Fig. 4. Search the PCM library from Library Manager (refer Fig. 5) and install it. Similarly, follow the above steps and install the PIR sensor library.
Coding Arduino
Arduino code (Motion_Detection.ino) is written in the Arduino programming language.
Initialise the libraries in the code and also declare the sensor and indicator pins as given below:
#include int sensorpin = 4; //sensor pin
Int led =13; //indicator pin
Initialise the audio file with encoded samples:
const unsigned char sample[] PROGMEM =
{ 126, 127, 127, 126, 127, 126, 127, 127,
126, 126,….… };
Define the pinMode using following instructions:
pinMode (sensorpin,INPUT);
pinMode(led,OUTPUT);
Create a variable that reads the sensor value in digital form:
int sensorValue = digitalRead (sensorpin);
Now, create a condition that compares with the sensor value. If the condition is true, it performs the task accordingly. Here the task is to play the sample audio file and turn on the LED indicator (LED1). Otherwise, the condition is false, with no audio alert and LED1 off. The following code performs these tasks:
if (sensorValue == 1)
{
startPlayback(sample,
sizeof(sample));
digitalWrite(led,HIGH);
}
else if (sensorValue == 0)
{
digitalWrite(led,LOW);
}
Construction and testing
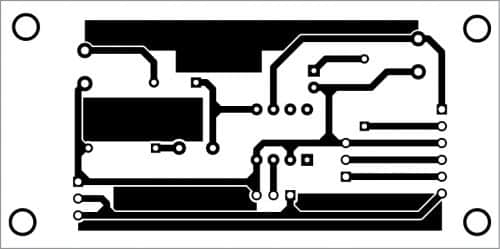
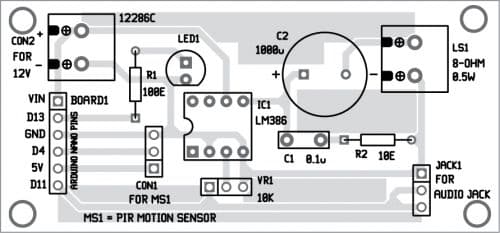
A PCB layout for the motion sensor alarm is shown in Fig. 6 and its components layout in Fig. 7.
Download PCB and Component Layout PDFs: click here
Before assembling the circuit, do not forget to upload Motion_Detection.ino on the Arduino Nano board. After assembling the circuit on the PCB, connect the PIR sensor across CON1 and 12V across CON2.
Crosscheck the wiring/connections as per the circuit diagram. Then, power on the circuit with a 12V DC supply or 12V battery.
You can install this project in your backyard or any other appropriate location in your house. Then extend the speaker and wires to your room. Alternatively, you can connect it to your mini speaker amplifier through an audio jack.
When you power on the circuit, and if someone is in front of the PIR sensor, you will hear ‘alert motion’ voice alert in the speaker continuously till the person moves away from the sensor. This sensor will detect a human in the range of up to ten metres based on the sensitivity of the sensor module. You can change the sensitivity by adjusting the inbuilt potmeter in the sensor module.

